
ПИҝҙТ»ПВЧоЦХР§№ыЈә

ЦЖЧч№эіМЈә
1ЎўРВҪЁТ»ёцОДјюЈ¬СЎФсНЦФІ№ӨҫЯЈ¬°ҙЧЎCtrlјь»ӯіцТ»ёцХэФІЎЈИ»әуСЎФсҪ»»ҘКҪМоід№ӨҫЯЈ¬ФЪНЦФІЙПАӯіцТ»ёцҙУ°ЧөҪЧПөДЙдПЯҪҘұдЈ¬ХвАпЧПЙ«ЦөОӘC: 20 M: 80 Y: 0 K: 20ЎЈНкіЙТ»ҝЕХдЦйЎЈ

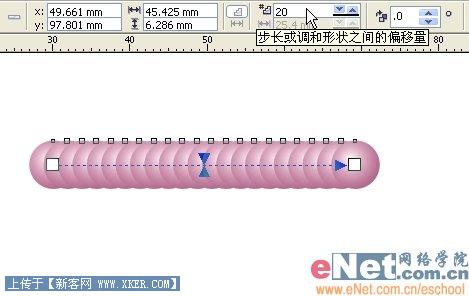
2ЎўҪ«НЦФІВЦАӘЙиОӘОЮЈ¬Ctrl+DёҙЦЖТ»ёцНЦФІЎЈСЎФсҪ»»ҘКҪөчәН№ӨҫЯЈ¬ФЪБҪёцНЦФІЦ®јдАӯіцТ»ёцөчәНЎЈ

3ЎўР§№ыИзПВЈ¬ІҪіӨЦөЛжәу»бёщҫЭРВөДВ·ҫ¶ҪшРРөчХыЎЈ
4ЎўУГНЦФІ№ӨҫЯ»ӯТ»ёцНЦФІЧчОӘРВВ·ҫ¶ЎЈУГҪ»»ҘКҪөчәН№ӨҫЯСЎЦРХдЦйЈ¬ФЪКфРФАёЙПөг“РВВ·ҫ¶”Ј¬Куұк»бұдіЙНдЗъөДјэН·ЧҙЎЈ
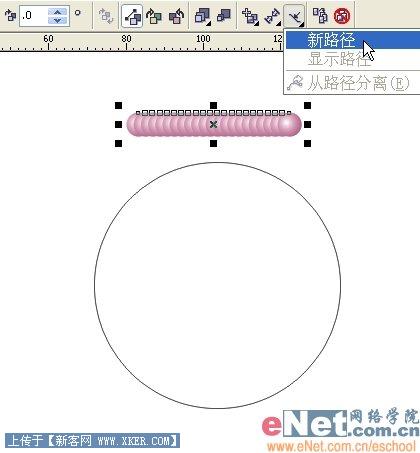
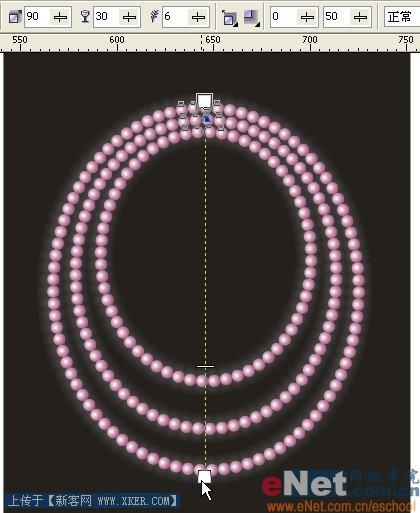
5ЎўҙЛКұФЪНЦФІЙПөгТ»ПВЈ¬ХдЦйҫНТФНЦФІОӘРВВ·ҫ¶БЛЈ¬Р§№ыИзПВЎЈ

6ЎўФЪКфРФАёЙПЙиЦГТ»ёцәПККөДІҪіӨЦөЈ¬ЦұөҪХдЦйІјВъХыёцФІ»·ЎЈ
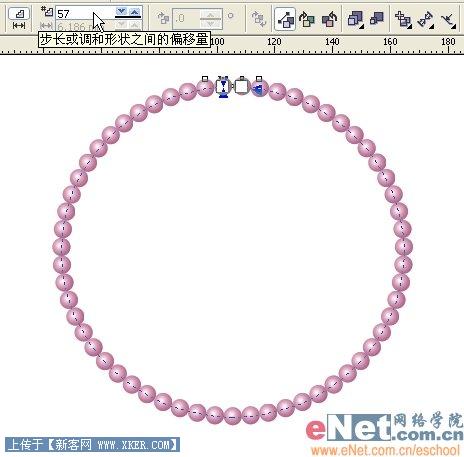
7ЎўУГМфСЎ№ӨҫЯөчХыФІ»·ЦБИзПВРОЧҙЈ¬ҫНіЙБЛТ»ёцјтөҘөДПоБҙЎЈ

8ЎўёҙЦЖіцБнНвБҪМхЈ¬Ҫ«ЛьГЗөДНЦФІВ·ҫ¶АӯіӨТ»Р©ІўПаУҰөШФцјУХдЦйөДІҪіӨЦөЈ¬Р§№ыИзПВЎЈ

9ЎўУГҫШРО№ӨҫЯ»ӯТ»ёцҙуҫШРОЈ¬МоідәЪЙ«Ј¬·ЕФЪЧоПВІгЧчОӘұіҫ°ЎЈ
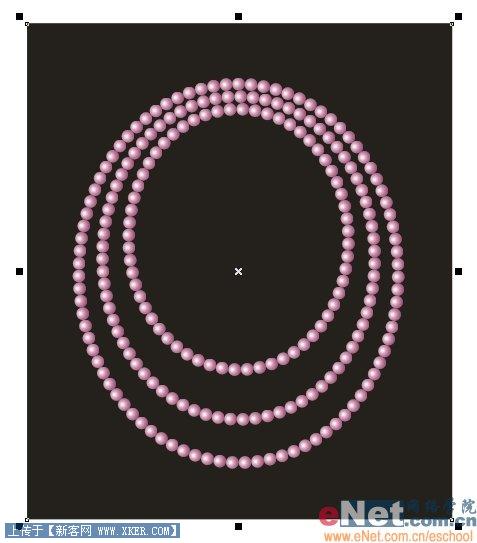
10ЎўСЎЦРИэМхХдЦйПоБҙІўCtrl+GИәЧйЎЈСЎФсҪ»»ҘКҪТхУ°№ӨҫЯЈ¬ФЪПоБҙЙПАӯіцТ»ёцТхУ°Ј¬ТхУ°СХЙ«ОӘ°ЧЈ¬ҫЯМеЙиЦГИзПВЎЈХвҫНРОіЙБЛХдЦйөД»Ф№вЎЈ
ЧоЦХР§№ыЈә


